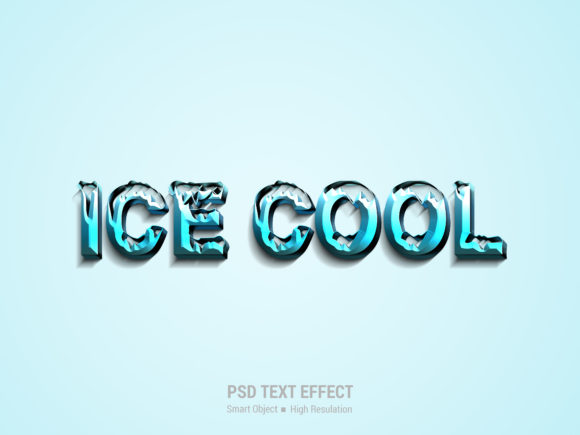
Ice Cool 3D Text Effect: Realistic Presentation Without the Learning Curve
Creating a design that looks professional often feels like a barrier to entry for many people. You might want to add depth and dimension to your logos, headlines, or social media graphics, but spending weeks learning complex software can be discouraging. This is where the Ice Cool 3D Text Effect becomes a game-changer. It bridges the gap between amateur attempts and high-end results by offering a streamlined workflow that prioritizes ease of use without sacrificing visual impact.
The primary appeal of this tool lies in its ability to deliver a highly realistic presentation instantly. Whether you are a marketer crafting an ad campaign, a small business owner designing a flyer, or a blogger looking to make your posts stand out, the visual quality matters. A poorly rendered 3D text effect can look cheap and unprofessional, potentially damaging your brand's credibility. Conversely, a crisp, ice-like texture with proper lighting and shadows conveys trust and sophistication. The Ice Cool 3D Text Effect solves this problem by automating the heavy lifting, allowing you to focus on the message rather than the mechanics of rendering.
Common Pitfalls in Design Implementation
Even with powerful tools available, users often stumble over simple misunderstandings that lead to subpar results. One of the most frequent mistakes involves ignoring the specific requirements of the file format before downloading. Many creators assume that any PSD file will work universally, but compatibility issues can arise if the version of Photoshop used is too old or if essential fonts are missing. When this happens, the layers may shift, or the smart object placeholder might not appear correctly, leading to frustration and wasted time.
Another significant error occurs during the editing process itself. Users sometimes try to edit the underlying pixels directly instead of utilizing the designated smart objects. If you attempt to paint or draw inside the main layer without entering the smart object container, you will likely destroy the pre-set lighting effects, reflections, and textures that give the text its "ice cool" appearance. Once these effects are damaged, they cannot be easily recovered, forcing you to start over from scratch. This not only reduces efficiency but also increases the cost of your project in terms of time and effort.
Furthermore, many beginners overlook the importance of resolution when preparing their final output. While it is easy to create a design quickly, printing or displaying it at a low resolution can result in pixelated edges that ruin the illusion of smooth ice. High-resolution files are crucial for maintaining that sharp, crystalline look, especially when the design needs to be scaled up for large banners or posters. Failing to check the dimensions before saving can lead to blurry images that look unpolished, undermining the entire purpose of using a premium effect.
How to Avoid These Common Errors
To ensure you get the best results, it is essential to follow a structured approach. First, always verify the system requirements before opening the file. Ensure you have the correct version of Adobe Photoshop installed to support the smart object features. Next, familiarize yourself with the concept of smart objects. This feature is the heart of the Ice Cool 3D Text Effect, designed specifically to protect your original artwork while applying complex filters and styles.
The workflow is intentionally simple to prevent errors. Instead of trying to manually recreate the 3D look, you simply double-click on the smart object icon within the layers panel. This action opens a separate window where you can paste your own design or text. Once you save this internal document, the changes automatically update in the main file, preserving all the intricate lighting and texture details. This method eliminates the risk of breaking the design structure and ensures that every element remains perfectly aligned.
Additionally, pay close attention to the layer organization. The file comes with fully layered structures organized neatly into folders. Taking a moment to explore these folders can provide valuable insights into how the effect was constructed. Understanding the hierarchy allows you to tweak specific elements, such as adjusting the shadow intensity or changing the color tint, without affecting the overall integrity of the image. This level of control is vital for professionals who need to customize designs to match specific brand guidelines.
Evaluating Your Options Before You Begin
Before committing to a specific design asset, consider what you actually need. Are you looking for a quick solution for a blog post, or do you require a print-ready file for a billboard? The Ice Cool 3D Text Effect offers high resolution, making it suitable for both digital and print applications. However, if you are working on a tight deadline, the no-skill requirement is your greatest ally. It removes the steep learning curve associated with 3D modeling, allowing you to produce high-quality graphics in minutes rather than hours.
When comparing different options, look for features that offer flexibility. A rigid template that does not allow for customization can limit your creativity. The strength of this particular effect lies in its combination of automation and manual control. You get the automatic realism of a professionally rendered scene, but you retain the freedom to input your unique content. This balance is what separates good designs from great ones.
- Check the Layer Structure: Ensure the file is well-organized so you can easily locate and edit specific components.
- Verify Resolution Settings: Confirm that the file supports the size you intend to use for your project.
- Test the Smart Object Workflow: Try replacing the content once to ensure you understand the process before starting your main project.
By avoiding the common traps of direct pixel editing and neglecting resolution checks, you can maximize the potential of the Ice Cool 3D Text Effect. This approach not only saves time but also guarantees a polished final product that meets professional standards. Whether you are an entrepreneur launching a new product or a hobbyist experimenting with graphic design, understanding these nuances will help you make better decisions and achieve superior outcomes.
In conclusion, the key to success with this tool is respecting the workflow it provides. Do not force the software to behave differently than intended; instead, let the smart objects do the heavy lifting. By following the simple steps of double-clicking, pasting, and saving, you unlock a world of realistic 3D possibilities. This method ensures that your designs remain sharp, professional, and visually striking, regardless of your technical skill level.